Are you in need of in-depth knowledge on onion and garlic production? If yes, we are a call away. Our service chatter includes: Onion seedlings, Garlic seedlings, Farm planning services, Soil testing, Drip irrigation installation and maintenance, Agronomic support, Onion and Garlic value pack and Farm management. For free consultation, placing orders or booking a visit with an agronomist, please contact us via Call or whatsapp +254703982228, Email: Info@oniondoctor.co.ke.
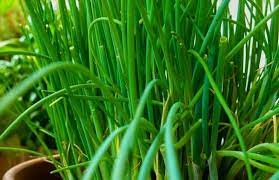
Chives farming in Kenya is a viable option for farmers interested in cultivating culinary herbs. Chives are a popular herb that belongs to the Allium family, along with onions, garlic, and leeks. They have a mild onion-like flavor and are commonly used in various dishes, adding taste and aroma. A kilo of chives fetches a farm gate price of up to 400 Ksh per Kilo making chive farming a very lucrative venture.
Here are some key points to consider when it comes to chives farming in Kenya:
- Climate and Soil Conditions :Chives require well-drained soils with a pH range of 6.0-7.0. The herb grows best in areas with moderate temperatures ranging from 15°C to 25°C. However, it can tolerate a wide range of temperatures from -10°C to 35°C. The plant requires adequate sunlight exposure for optimal growth.
- Varieties:There are several varieties of chives that can be grown in Kenya, including: Common Chives (Allium schoenoprasum) – This is the most commonly grown variety in Kenya. It has thin, grass-like leaves that are hollow and produce pinkish-purple flowers. Garlic Chives (Allium tuberosum) – Also known as Chinese chives, this variety has flat, wide leaves and a garlicky flavor. It produces white flowers. Siberian Chives (Allium nutans) – This variety has a similar appearance to common chives but with wider leaves. It produces lavender flowers. Giant Siberian Chives (Allium ledebourianum) – This variety has thicker leaves and grows taller than common chives. It produces pink-purple flowers.
- Propagation: Chives can be propagated through seeds or vegetative means. Seeds are sown in well-prepared beds and covered lightly with soil. The seeds germinate in 10-14 days. Alternatively, chives can be propagated vegetatively through division of the bulbs. The bulbs are dug up and divided into smaller sections, each containing a few leaves and roots. These sections are then planted in prepared beds.
- Planting and Spacing: If planting from seeds, sow them at a depth of about 1 centimeter. Once the seedlings are 4-6 weeks old, they can be transplanted to the main field. Plant chives in rows with a spacing of about 20-25 centimeters between plants and 40-45 centimeters between rows.
- Crop Management: Chives require regular watering to keep the soil evenly moist. Mulching can help conserve moisture and suppress weed growth. Chives generally do not require heavy fertilization, but incorporating well-rotted organic matter into the soil before planting can improve fertility. Remove any weeds that compete with the chive plants.
- Water management on chives farming in Kenya • Ensure constant moisture availability around the crop root zone. This calls for regular watering, mulch can be used around the plant base to conserve water. The best irrigation for effective chive farming is drip irrigation. Do not hesitate to contact us for a customized quote and drip installation for your farm.
- Chives pest control and disease management • The crop is rarely attacked by pests and diseases hence its management is quite cheap. Major pests that might be found on the crop are thrips, aphids and cutworms. • Thrips feed by sucking the plant sap and infestation leads to discolored, distorted tissue and scarring of leaves. The severely attacked plants may have a silvery appearance. • Aphids suck the plant’s sap causing the leaves to curl and become distorted. They excrete honeydew which facilitates the development of sooty mold. • Cutworms cut the stems of young transplants or seedlings at soil level.
- Diseases: May range from smut, mildews, leaf spots, rust, bulb rots and white rot. Keep the field clean, planting materials used should be disease free. In case of heavy infestation do not hesitate to book a visit with our agronomist for diagnosis and prompt advice on chemical or organic disease control.
Harvesting chives
Harvest chives 30-45 days after you transplant or 60 days after seeding. Be sure to cut the leaves down to the base when harvesting. Harvest 3 to 4 times during the first year. In subsequent years, cut plants back monthly.
• Chives have a relatively short shelf life, so it’s important to harvest and market them promptly. Establish market connections with local restaurants, supermarkets, or farmers’ markets to sell your chives.
Post-harvest handling of chives
Use chives when they’re fresh or frozen, freeze the leaves in an airtight bag. Dried chives lose their flavor hence drying should not be done in any case. Store chives in a cool place.
Onion Doctor supports small holder farmers across Africa with quality and affordable Onion and Garlic seedlings, Onion seedlings, Farm planning services, Soil testing, Drip irrigation installation and maintenance, Agronomic support, Onion and Garlic value pack, Farm management, E-extension and on-farm training for farmers to optimize on yields and get maximum profits