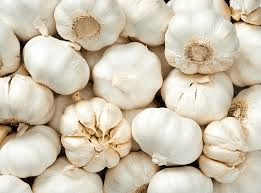
Welcome to the Onion Doctor blog, where we are igniting a flavor revolution with garlic farming i Kenya! Buckle up for a thrilling ride into the world of garlic, the pungent, aromatic superstar that is perfect for Kenyan gardens. Whether you are a seasoned farmer in the highlands or a curious beginner trying garlic farming in Kenya for the first time this guide will empower you to grow plump, flavorful bulbs that will spice up your meals and impress your neighbors. With garlic farming in Kenya gaining popularity for it is profitability, we are here to share fun tips, quirky facts, and expert steps to make your garlic patch thrive. From the fertile soils of Nyeri to the sunny plots of Nakuru, garlic farming in Kenya is a rewarding adventure that is easier than you think. Get ready to master garlic farming in Kenya and transform your garden into a zesty paradise with Onion Doctor!
BENEFITS OF PLANTING GARLIC
- High demand and Market Value: Garlic is a staple in nearly every cuisine worldwide, ensuring consistent demand. Specialty or organic garlic can fetch premium prices in niche markets and at farmers’ markets.
- . Low Maintenance Crop: Garlic is relatively easy to grow and requires minimal care once established. It is naturally pest-resistant due to its sulfur compounds, reducing high demand for chemical pesticides.
- . Long Shelf Life: When cured and stored properly, garlic can last for 6–9 months, allowing for extended sales windows and less post-harvest pressure .Dried garlic, powder, and preserved garlic offer additional shelf-stable product options.
- . Health Benefits: Rich in allicin and antioxidants, garlic is known to support immune health, reduce blood pressure, and fight inflammation. Growing your own ensures it’s chemical-free and fresh—ideal for health-conscious consumers.
- Low Water Requirement: Garlic doesn’t need excessive irrigation—especially during bulb formation and curing—making it a drought-tolerant option for water-conscious farmers.
GARLIC PLANTING PROCEDURE
STEP 1: CHOOSING THE RIGHT GARLIC VARIETY
Garlic comes in two main types: softneck and hardneck. Each has unique characteristics, so pick the one that suits your Kenyan climate and culinary needs.
- Softneck Garlic:
- Best for warmer Kenyan regions like Mombasa.
- Stores longer( up to 9 months)
- Popular varieties: California Early.
- Hardneck Varieties:
- Thrives in cooler Kenyan Highlands like Nyeri or Eldoret.
- Produces fewer larger cloves.
- Bolder, complex flavors.
- Popular varieties: Rocamble.
2. WHEN AND WHERE TO PLANT
Timing: For garlic farming in Kenya, plant in the cooler, dry season to allow roots to establish.
Location:
- Sunlight: Choose a spot with full sun (6-8 hours daily), perfect for Kenyan farmers.
- Soil: Garlic loves well-drained, fertile soil with a pH of 6.0-7.0. Add compost or aged manure widely available in Kenya to enrich the soil.
- Space: Ensure good air circulation to prevent fungal issues, common in humid Kenyan regions.
STEP 3: PREPARING AND PLANTING GARLIC CLOVES
Here is where the fun of garlic farming in Kenya begins! Follow these steps to plant your garlic:
- Break the Bulb: Gently separate the garlic bulb into individual cloves, keeping the papery skin intact. Choose the largest, healthiest cloves for planting.
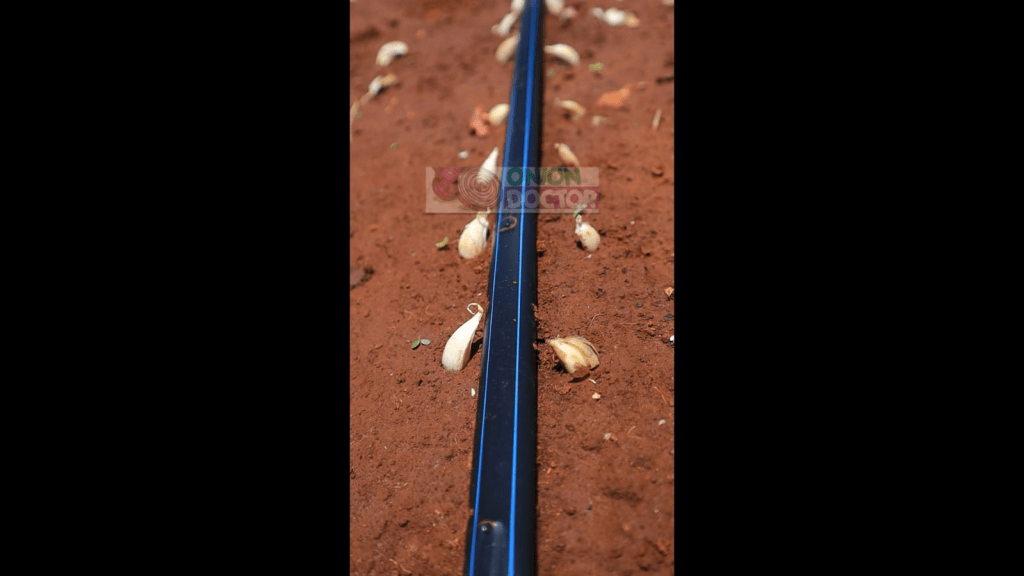
- Plant Properly: Place each clove pointy-end up, 2 inches deep and4-6 inches apart in rows spaced 12 inches apart.
- Cover and Mulch: Cover with soil and add mulch to protect cloves during the cooler seasons
STEP 4: CARING FOR YOUR GARLIC CROP
Garlic is low-maintenance, perfect for garlic farming in Kenya, but a little care ensure a bumper harvest:
- Watering: Keep soil consistently moist but not waterlogged( about 1 inch of water per week), especially during Kenya`s dry seasons.
- Weeding: Remove weeds to prevent competition, a key step for Kenyan farmers.
- Fertilizing: Apply a balanced fertilizer in the growing season when shoots emerge.
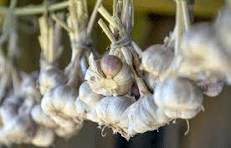
STEP 5: HARVESTING AND STORING YOUR GARLIC
Harvest in December to February when the lower 2-3 leaves turn brown but upper leaves are still green. Dig carefully to avoid damaging bulbs.
- Curing: Hang bulbs in a dry, air spot for 2-4 weeks to cure, a common practice in garlic farming in Kenya. Trim roots and stems once fully dried.
- Storage: For Softneck: Store in a cool, dry place for up to 9 months. For Hardneck: Stores for 3-6 months in similar conditions.
Onion Doctor Tip: Save your best bulbs for replanting next season to Keep your garlic farming in Kenya cycle going!
Contact us for: Onion seedlings, Garlic seedlings, Germinated garlic cloves, Farm planning services, Soil testing, training on onion and garlic growing, Drip irrigation installation and maintenance, Agronomic support, Onion and Garlic value pack and Farm management. For free consultation, placing orders or booking a visit with an agronomist, please contact us via Call or what’s app +254703982228, Email: Info@oniondoctor.co.ke. You can also check out our social media handles for daily updates on TikTok: https://www.tiktok.com/@oniondoctorke?_t=ZM-8wmsTu0qumO&_r=1 Instagram: https://www.instagram.com/oniondoctorke?igsh=MTVoaHF3aWUydTJzaQ==Facebook:https://www.facebook.com/share/16SwgYn2dG/ Youtube:https://youtube.com/@oniondoctorke?si=u5Jnd-r0qU9UDYqL and Twitter: https://x.com/OnionDoctorKe?t=FR3JXlS_oN1vjjUgAtfyzg&s=09