
If you are searching for a high-value crop with incredible profit margins, garlic farming in Kenya should be at the top of your list. Over the past decade, garlic farming in Kenya has transformed from a small-scale backyard activity into a serious commercial enterprise. With rising demand in local markets, hotels, and export channels, garlic farming in Kenya offers farmers a chance to earn significantly more per acre than traditional crops like maize or beans. The beauty of garlic farming in Kenya lies in its versatility. Whether you are in Nakuru, Meru, Nyeri, or even the warmer coastal regions, garlic farming in Kenya can be adapted to your specific agro-climatic zone. This comprehensive guide will walk you through every aspect of garlic farming in Kenya, ensuring you have the knowledge to launch or scale your operation successfully.
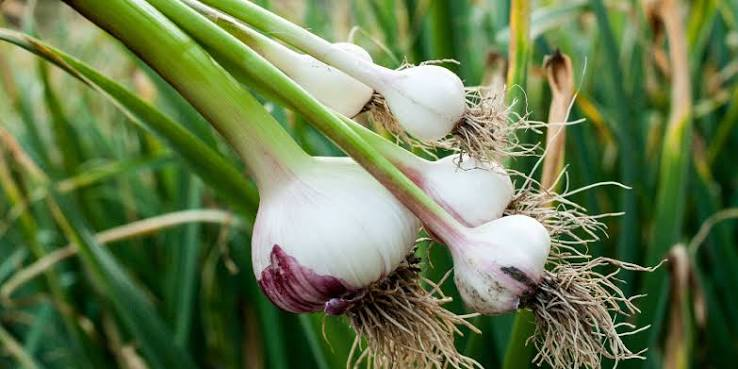
Why Choose Garlic Farming in Kenya?
Before diving into the technical details, let us explore why garlic farming in Kenya is attracting both novice and experienced farmers:
1. Exceptional Market Demand:
Kenya consumes thousands of tons of garlic annually, yet local production meets only a fraction of this demand. Most garlic sold in Kenyan supermarkets is imported from China and Egypt. This gap creates a massive opportunity for local producers. Garlic farming in Kenya allows you to tap into an underserved market with premium pricing power.
2. High Profit Margins Per Acre:
Compared to conventional crops, garlic farming in Kenya generates impressive returns. A well-managed acre can yield between 4,000 and 6,000 kilograms. With farm-gate prices ranging from KSh 150 to KSh 300 per kilogram depending on quality and season, garlic farming in Kenya can easily net KSh 400,000 to KSh 600,000 per acre per season.
3. Low Input Requirements After Establishment:
Once planted, garlic requires minimal daily management. Unlike vegetables that need constant attention, garlic farming in Kenya is relatively hands-off between planting and harvesting, making it ideal for farmers who also hold other employment.
4. Long Shelf Life and Storage Advantages:
One major advantage of garlic farming in Kenya is that harvested bulbs store for months without refrigeration. This allows farmers to hold their harvest and sell when prices peak, rather than being forced to sell immediately at low prices.
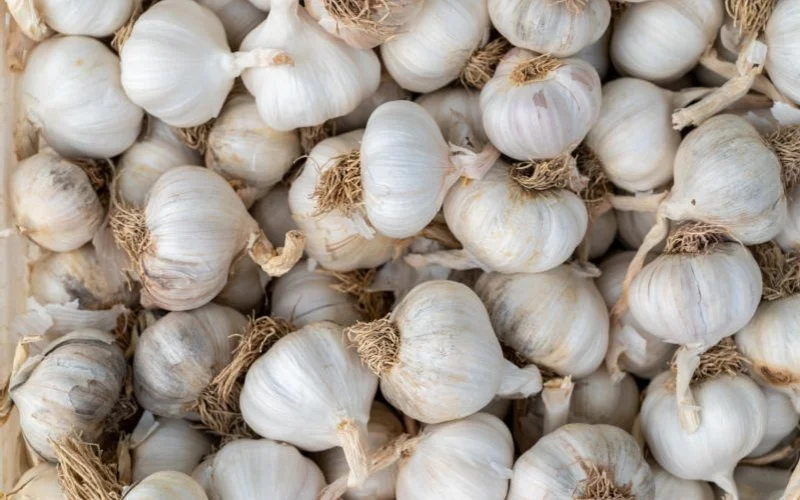
Understanding the Climate for Garlic Farming in Kenya:
Climate is a critical success factor in garlic farming in Kenya. Garlic thrives in specific temperature and moisture conditions, and understanding your local climate will determine your success.
Temperature Requirements:
Garlic prefers cool to warm temperatures between 12°C and 24°C. This makes the highland regions of Kenya such as Timau, Molo, Nyandarua, and parts of Kiambu particularly suitable for garlic farming in Kenya. However, with proper irrigation and variety selection, garlic farming in Kenya is also expanding into warmer areas like Machakos, Kajiado, and even parts of the Rift Valley.
Rainfall and Irrigation:
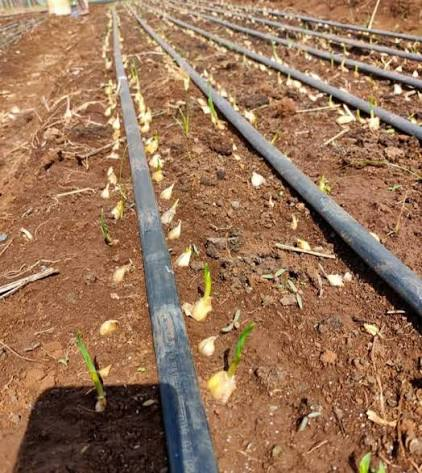
While garlic requires consistent moisture during its early growth stages, waterlogging is its enemy. Successful garlic farming in Kenya depends on well-drained soils and controlled irrigation. In areas with erratic rainfall, drip irrigation has become a game-changer for garlic farming in Kenya, ensuring steady moisture without drowning the bulbs.
Altitude:
Most successful garlic farming in Kenya occurs at altitudes between 1,500 and 2,500 meters above sea level. These elevations provide the cool nights that garlic needs to develop large, firm bulbs.
Soil Preparation: The Foundation of Successful Garlic Farming in Kenya:
You cannot talk about profitable garlic farming in Kenya without emphasizing soil health. Garlic demands loose, fertile, well-drained soils with a pH between 6.0 and 7.0.
Soil Testing:
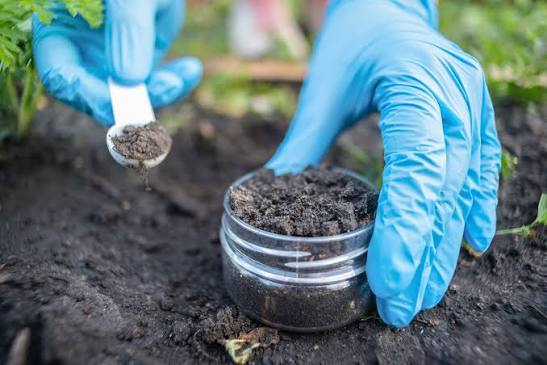
Before starting garlic farming in Kenya, invest in a professional soil test. Many farmers skip this step and later wonder why their bulbs are small or diseased. A soil test will reveal pH levels, nutrient deficiencies, and drainage characteristics essential data for garlic farming in Kenya.
Bed Preparation:
Raised beds are highly recommended for garlic farming in Kenya. They improve drainage, warm the soil faster, and make harvesting easier. Prepare beds that are 1 meter wide and 20 to 30 centimeters high. Incorporate plenty of organic matter compost or well-decomposed manure is the secret weapon of top-performing garlic farming in Kenya operations.
Correcting Soil pH:
If your soil is too acidic, which is common in many parts of Kenya, apply agricultural lime several weeks before planting. This simple step can dramatically improve yields in garlic farming in Kenya.
Best Garlic Varieties for Garlic Farming in Kenya:
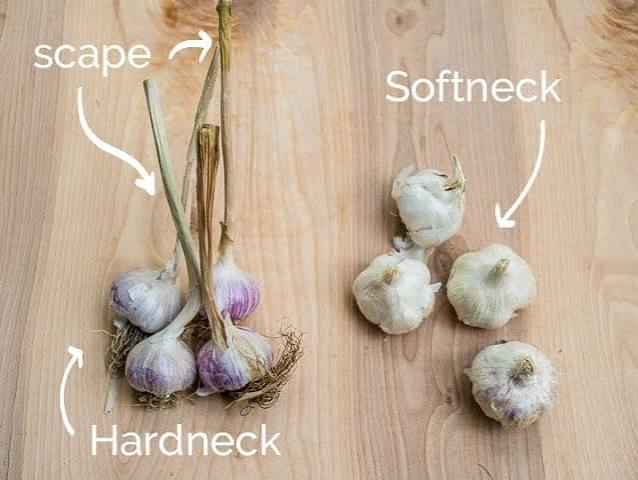
Variety selection can make or break your garlic farming in Kenya venture. The two main categories are:
Softneck Varieties:
These are the most common in garlic farming in Kenya because they store longer and adapt well to diverse climates. They do not produce a flower stalk (scape), meaning all the plant’s energy goes into bulb development. Popular softneck varieties among those practicing garlic farming in Kenya include California Early and Creole types.
Hardneck Varieties:
Hardneck garlic produces a central flower stalk and typically has larger, easier-to-peel cloves. While they do not store as long as softnecks, they are gaining popularity in garlic farming in Kenya for their bold flavors and premium market appeal.
Sourcing Quality Seed Garlic:
The biggest mistake newcomers to garlic farming in Kenya make is using supermarket garlic as seed. These bulbs are often treated with sprout inhibitors and may carry diseases. Always purchase certified seed garlic from reputable suppliers like Onion Doctor. Quality seed is the single most important investment in garlic farming in Kenya.
Step-by-Step Planting Guide for Garlic Farming in Kenya:
Timing is everything in garlic farming in Kenya. The optimal planting season is typically at the onset of the short rains (October to November) or the long rains (March to April), depending on your region and irrigation capacity.
Step 1: Seed Preparation:
Break bulbs into individual cloves carefully, ensuring the basal plate remains intact. Select only the largest, healthiest cloves this directly impacts yield. Experienced practitioners of garlic farming in Kenya know that bigger cloves produce bigger bulbs.
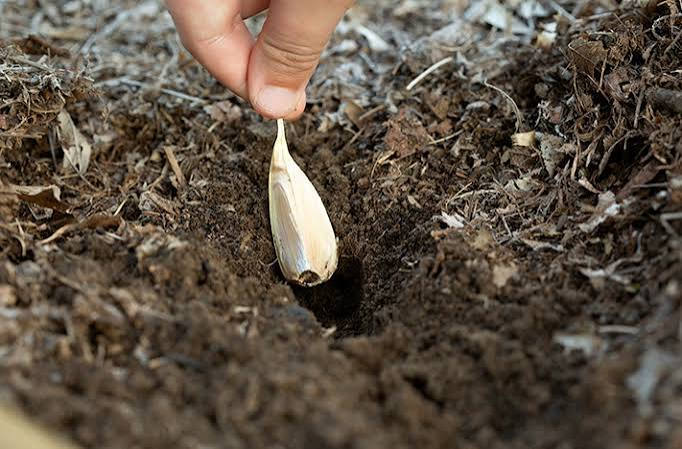
Step 2: Spacing:
Plant cloves 2 to 3 centimeters deep with the pointed end facing upward. Space rows 30 centimeters apart and plants 10 to 15 centimeters apart within the row. Proper spacing is crucial in garlic farming in Kenya to prevent overcrowding and ensure adequate bulb sizing.
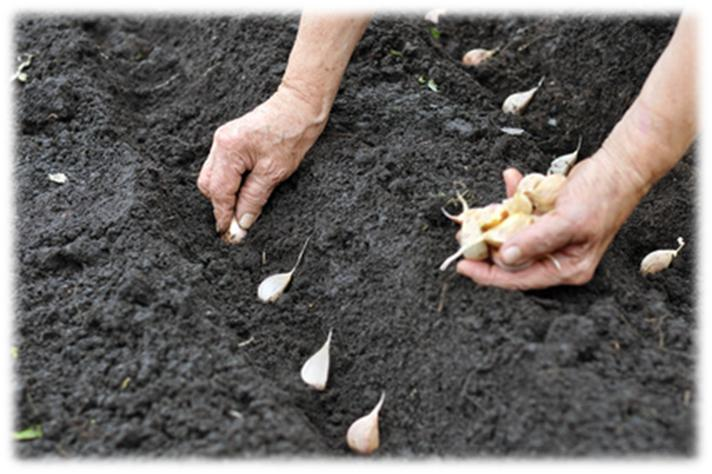
Step 3: Mulching:
Apply a layer of organic mulch grass, straw, or dried leaves after planting. Mulching conserves moisture, suppresses weeds, and regulates soil temperature. In garlic farming in Kenya, mulching can reduce irrigation needs by up to 40 percent.
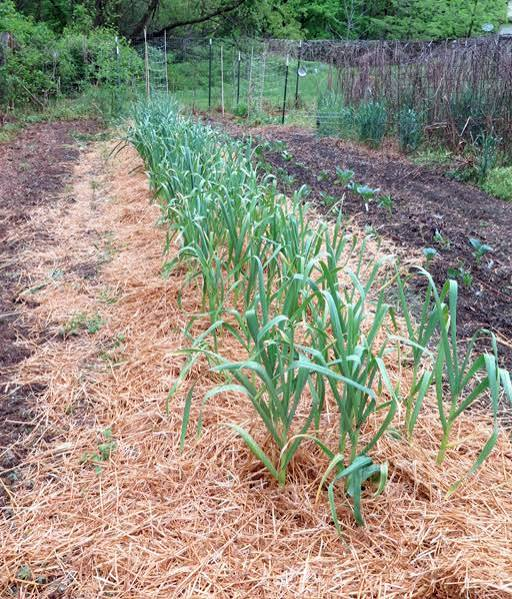
Step 4: Watering:
Keep the soil consistently moist but never waterlogged for the first six weeks. As bulbs mature, gradually reduce watering. This hardening-off process is essential in garlic farming in Kenya to prevent rot and encourage proper curing.
Fertilization Strategies for Garlic Farming in Kenya:
Garlic is a heavy feeder, and proper nutrition separates amateur efforts from professional garlic farming in Kenya.
Basal Application:
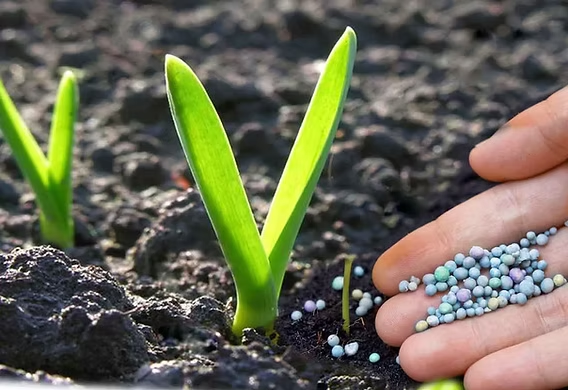
Before planting, apply well-decomposed manure per acre. Add a balanced NPK fertilizer based on your soil test results. Most successful garlic farming in Kenya operations use a formulation like 17-17-17 at planting.
Top-Dressing:
Apply nitrogen-rich top-dressing when plants reach 15 to 20 centimeters in height, typically 4 to 6 weeks after planting. A second application may be needed depending on soil fertility. In garlic farming in Kenya, split applications prevent nutrient leaching during heavy rains.
Micronutrients:
Do not ignore micronutrients. Boron, zinc, and magnesium deficiencies are common in garlic farming in Kenya and can cause hollow bulbs, poor skin formation, and reduced yields. Foliar feeds containing these micronutrients should be applied every two weeks during active growth.
Pest and Disease Management in Garlic Farming in Kenya:
Healthy plants are profitable plants. Garlic farming in Kenya faces several biological challenges that require proactive management.
Common Pests:
- Thrips: These tiny insects suck sap from leaves, causing silvery streaks. They are the most destructive pest in garlic farming in Kenya.
- Onion flies: Larvae bore into bulbs, causing rot.
- Nematodes: Microscopic worms that damage roots and create entry points for disease.
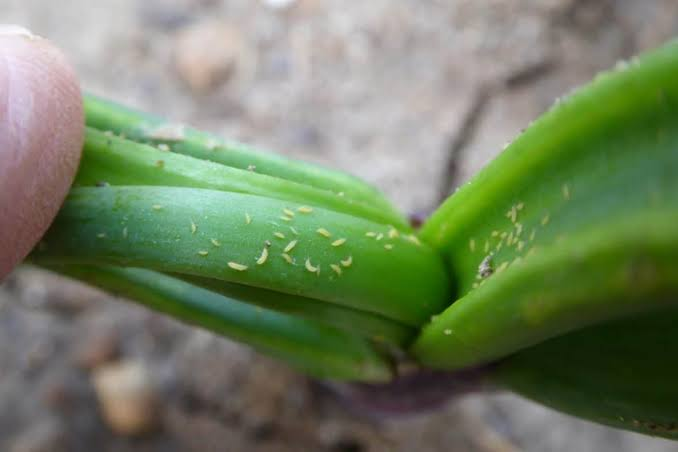
Integrated Pest Management (IPM) is the best approach for sustainable garlic farming in Kenya. This includes crop rotation, use of resistant varieties, biological controls, and targeted pesticide applications only when necessary.
Major Diseases:
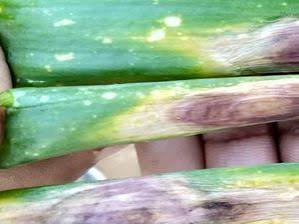
- Purple Blotch: Causes purple lesions on leaves and reduces yields significantly.
- Downy Mildew: Thrives in humid conditions and can devastate garlic farming in Kenya during wet seasons.
- White Rot: The most feared disease in garlic farming in Kenya. It persists in soil for years and has no chemical cure. Prevention through certified seed and strict crop rotation is essential.
Preventive Measures:
- Practice strict crop rotation (avoid planting garlic or onions in the same field for at least 3 years)
- Use certified disease-free seed
- Maintain proper spacing for air circulation
- Remove and destroy infected plants immediately
Weed Control in Garlic Farming in Kenya:
Garlic is a poor competitor with weeds, especially in its early growth stages. Weed control is non-negotiable in garlic farming in Kenya.
Manual Weeding:
Hand weeding is common in small-scale garlic farming in Kenya, but care must be taken not to damage shallow garlic roots.
Mulching:
As mentioned earlier, organic mulch suppresses weeds effectively and is highly recommended for garlic farming in Kenya.
Herbicides:
Selective herbicides can be used in large-scale garlic farming in Kenya, but always follow label instructions and observe pre-harvest intervals to ensure food safety.
Harvesting and Post-Harvest Handling in Garlic Farming in Kenya:
Knowing when and how to harvest is critical for maximizing profits in garlic farming in Kenya.
When to Harvest:
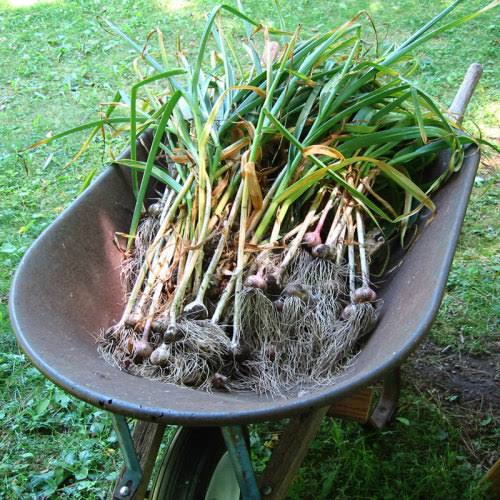
Garlic is ready for harvest when 50 to 75 percent of the leaves have turned yellow and dried. In garlic farming in Kenya, this typically occurs 4 to 5 months after planting, depending on the variety and growing conditions.
How to Harvest:
Loosen the soil with a fork before pulling bulbs by hand. Never pull directly without loosening first this is a common mistake in garlic farming in Kenya that leads to bruised and unsellable bulbs.
Curing:
Proper curing transforms good garlic into premium garlic. In garlic farming in Kenya, cure harvested bulbs in a shaded, well-ventilated area for 2 to 4 weeks. Avoid direct sunlight, which can cause sunscald. Properly cured garlic from garlic farming in Kenya can store for 6 to 8 months.
Grading and Packaging:
Sort bulbs by size and quality. Premium large bulbs command the highest prices in Kenyan markets. Invest in attractive packaging if targeting supermarkets or export markets. Presentation matters enormously in garlic farming in Kenya.
Are you in need of in-depth knowledge on onion and garlic production? If yes, we are a call away. Contact us for: Onion seedlings, Garlic seedlings, Germinated garlic cloves, Farm planning services, Soil testing, training on onion and garlic growing, Drip irrigation installation and maintenance, Agronomic support, Onion and Garlic value pack and Farm management. For free consultation, placing orders or booking a visit with an agronomist, please contact us via Call or what’s app +254703982228, Email: info@oniondoctor.co.ke You can also check out our social media handles for daily updates on TikTok: https://www.tiktok.com/@oniondoctorke0706252490?_r=1&_t=ZS-96UPUyx6ESL Instagram:https://www.instagram.com/oniondoctorke?igsh=MW5sZzJ6c3BnZ3Z0dw==Facebook:https://www.facebook.com/share/1HouRgLCwS/Twitter:https://x.com/OnionDoctorKe?s=20