
If you’ve ever walked through Nairobi’s City Market, Mombasa’s Kongowea, or Nakuru’s Wakulima Market, you’ve seen them those vibrant green bunches of spring onions neatly tied with rubber bands, selling faster than vendors can restock. But here’s what most people don’t realize: spring onion farming in Kenya is one of the most profitable, fast-maturing, and beginner-friendly agricultural ventures you can start today. Unlike bulb onions that take 3–4 months to mature, spring onions are ready for harvest in just 6–8 weeks (45–60 days). That means a farmer can plant, harvest, and sell three to four times per year on the same piece of land. With retail prices ranging from KSh 15–85 per kilogram, the math is irresistible. Whether you’re a smallholder farmer in Nyandarua with a quarter-acre plot or a commercial grower in Kajiado with irrigation infrastructure, spring onion farming in Kenya offers a pathway to consistent income and food security. In this comprehensive guide, we’ll walk you through everything you need to know about spring onion farming in Kenya from selecting the best varieties and preparing your land, to pest management, harvesting, and selling at premium prices. We’ll also share real success stories from Kenyan farmers who turned small plots into thriving businesses t.

What Are Spring Onions? Understanding the Crop:
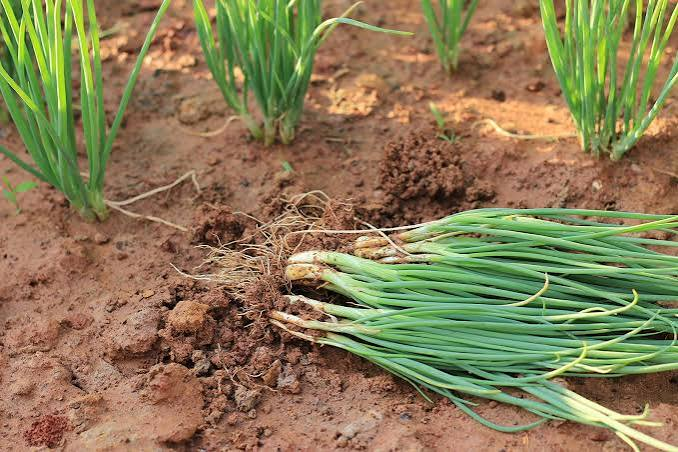
Spring onions (Allium fistulosum), also known as green onions, or bunching onions, are non-bulbing onion varieties grown primarily for their long, hollow green leaves and slender white stems. Unlike bulb onions that develop large underground bulbs, spring onions are harvested young when the stems are pencil-thick and about 15–20 cm tall.
Key Characteristics That Make Spring Onions Perfect for Kenya:
| Feature | Benefit for Kenyan Farmers |
|---|---|
| Fast growth | Harvest in 6–8 weeks in warm weather |
| High yield | 10,000–15,000 kg per acre annually |
| Continuous harvest | Cut leaves early while plant keeps growing |
| Low space requirement | Ideal for urban and peri-urban farming |
| Shallow root system | Grows well in areas with limited soil depth |
| Multiple harvests/year | 3–4 cycles possible on the same land |
The demand for fresh spring onions in Kenya’s urban centers Nairobi, Mombasa, Kisumu, Nakuru, and Eldoret is skyrocketing. Restaurants, supermarkets, hotels, and households use them daily for salads, stir-fries, soups, garnishes, and traditional dishes like sukuma wiki and nyama choma accompaniments. With Kenya’s vegetable market growing at 29% annually, onion farming in Kenya presents a lucrative opportunity for both subsistence and commercial farmers.
Best Varieties for Spring Onion Farming in Kenya:
Choosing the right variety is the single most important decision you’ll make. The wrong variety in the wrong zone leads to poor yields, wasted investment, and heartbreak.
Ideal Growing Conditions for Spring Onion Farming in Kenya:
Climate Requirements:
Spring onions are remarkably adaptable, but they perform best under these conditions:
| Parameter | Optimal Range |
|---|---|
| Temperature | 13°C to 25°C |
| Altitude | 500–2,500 meters above sea level |
| Annual rainfall | 600–1,200mm (well-distributed) |
| Sunlight | Minimum 6 hours of full sun daily |
Soil Requirements:
For successful onion farming in Kenya, your soil must meet these criteria:
- Soil type: Well-drained loamy or sandy loam
- pH level: 6.0–7.5 (slightly acidic to neutral)
- Organic matter: High content; incorporate compost manure
- Drainage: Excellent; spring onions hate waterlogged roots
- Depth: At least 15–20cm for healthy root development
Pro tip: Before starting your onion farming in Kenya venture, invest in a soil test. Knowing your soil’s pH and nutrient profile helps you apply the right fertilizers and amendments, saving money and maximizing yields. Contact Onion Doctor for soil testing services.
Step-by-Step Guide to Spring Onion Farming in Kenya:
Step 1: Land Preparation: Building the Foundation:
Proper land preparation is the bedrock of profitable onion farming in Kenya. Here’s how to do it right:
- Clear the land: Remove all weeds, bushes, and perennial grasses. Use a non-selective herbicide if necessary, applied 2–3 weeks before planting.
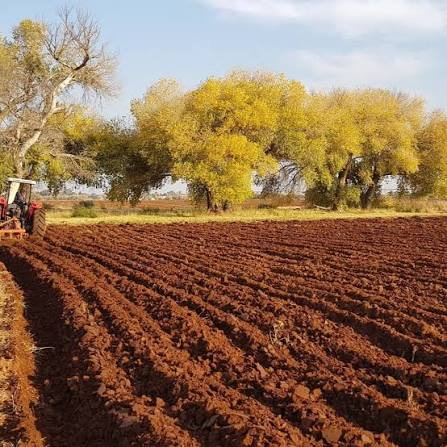
- Deep plowing: Till the soil to 15–20 cm depth to ensure proper aeration and root penetration.
- Create raised beds: Make beds 1 meter wide and 10–15 cm high to improve drainage critical during Kenya’s heavy rainy seasons.
- Add organic matter: Mix well-decomposed manure thoroughly into the soil.
- Apply basal fertilizer: Add phosphate fertilizer like DAP at planting to support strong root development.
- Soil pH adjustment: If your soil is too acidic, add agricultural lime. For alkaline soils, mix in gypsum. Allow 2–3 weeks for amendments to take effect.
Step 2: Nursery Preparation: Where Champions Are Born:
Most successful onion farming in Kenya starts with a well-managed nursery. Here’s the proven method:
- Prepare nursery beds: 1 meter wide, 10–15 cm high, with fine, sieved soil.
- Make furrows: Space them 15 cm apart, 2–3 cm deep.
- Sow seeds: Plant thinly along the furrows. Don’t overcrowd thin seedlings grow stronger.
- Mulch: Cover with grass or banana leaves to protect seeds from splashing out during irrigation and to retain moisture.
- Germination: Expect sprouts in 7–10 days.
- Shade management: Remove mulch after germination and create a shade structure above tender seedlings to protect from intense midday sun.
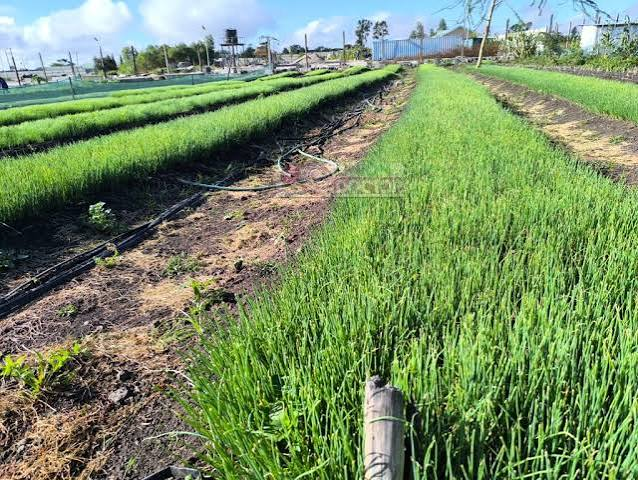
Transplanting timing: Seedlings are ready after 4–6 weeks when they reach 15 cm height with pencil-thick bases.
Step 3: Transplanting: The Critical Phase:
Transplanting is where many spring onion farming in Kenya beginners stumble. Follow these rules:
- Timing: Transplant early morning or late evening to avoid hot midday sun scorching tender seedlings.
- Spacing:30 cm between rows, 8–10 cm within rows. This gives each plant room to develop thick, marketable stems.
- Depth: Plant at the same depth as in the nursery don’t bury the crown.
- Irrigation: Water the field before and after transplanting to reduce transplant shock.
- Hardening off: Reduce shade two weeks before transplanting to improve survival rates in the field.
Dry season tip: If transplanting during the dry season, irrigate the field thoroughly before planting and maintain consistent moisture until plants are established.
Step 4: Fertilizer and Nutrient Management:
Proper nutrition separates amateur onion farming in Kenya from professional, high-yield operations:
| Growth Stage | Fertilizer | Rate | Purpose |
|---|---|---|---|
| Basal (Planting) | DAP (Diammonium Phosphate) | 20g per m² | Root establishment |
| 4 weeks after transplanting | CAN (Calcium Ammonium Nitrate) | 9 kg per acre | Leaf development |
| Ongoing | Urea + Potassium | As needed | Stem thickening and green color |
Trace elements: Apply fertilizers containing zinc, magnesium, manganese, and boron to prevent deficiencies that cause yellowing leaves and stunted growth.
Step 5: Irrigation: The Lifeline:
Consistent moisture without waterlogging is the golden rule of spring onion farming in Kenya:
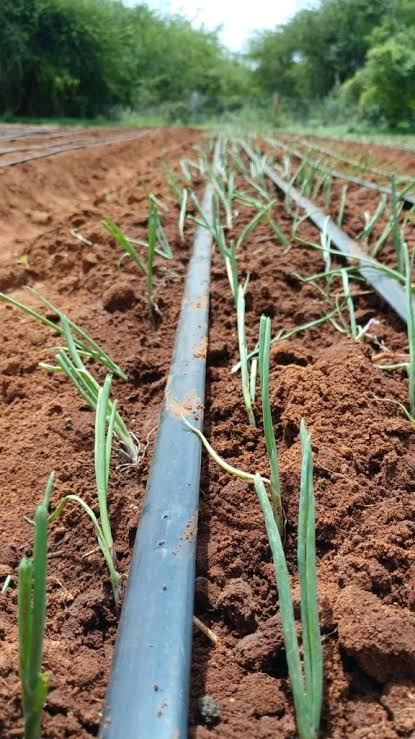
- Drip irrigation: Highly recommended for water efficiency and disease prevention. It delivers water directly to roots while keeping foliage dry.
- Frequency: Water daily in hot weather; every 2–3 days in cooler periods.
- Amount: Keep soil moist but not saturated. Spring onions have shallow roots—overwatering causes root rot.
- Critical periods: Germination and early establishment phases require the most attention.
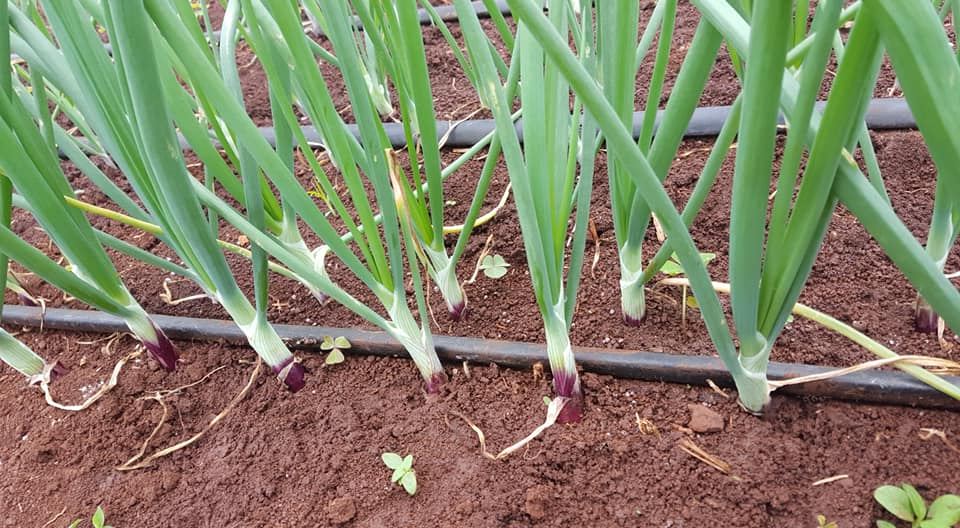
Avoid: Overhead irrigation that keeps foliage wet, as this promotes fungal diseases like downy mildew and purple blotch.
Step 6: Pest and Disease Management:
Protecting your crop is vital for profitable spring onion farming in Kenya. Here’s your battle plan:
Common Pests:
| Pest | Damage | Control Method |
|---|---|---|
| Onion thrips | White flecking on leaves, stunted growth | Insecticides (rotate active ingredients), increase watering |
| Aphids | Cluster under leaves, spread viruses | Spray with water, use natural insecticides like neem oil |
| Cutworms | Cut seedlings at soil level | Hand-picking, apply wood ash around plants |
| Leaf miners | Tunnel through leaves | Yellow sticky traps, biological controls |
Common Diseases:
| Disease | Symptoms | Prevention & Control |
|---|---|---|
| Downy mildew | Yellow patches on leaves, fuzzy growth underneath | Proper spacing, avoid wet foliage, apply fungicides |
| Purple blotch | Purple lesions on leaves | Fungicides, crop rotation, resistant varieties like Evergreen Bunching |
| Neck rot | Soft, discolored neck tissue | Ensure proper curing, avoid injuries during harvest |
| White rot | White fungal growth at base, plant wilting | Crop rotation (avoid alliums for 3–4 years), soil solarization |
Integrated Pest Management (IPM) for Onion Farming in Kenya:
- Regular crop scouting: Walk your field every 2–3 days looking for early signs of trouble.
- Crop rotation: Never plant onions in the same spot continuously. Rotate with legumes (beans, peas) or brassicas (cabbage, kale).
- Certified seedlings: Always use disease-resistant varieties from reputable suppliers like Onion Doctor.
- Field hygiene: Remove crop debris after harvest; weeds harbor pests and diseases.
- Buffer zones: Create space between onion plots and other crops to limit pest spread.
Harvesting and Post-Harvest Handling:
When to Harvest:
Spring onions are ready when:
- Plants are 30–40 cm tall
- Stems are pencil-thick (8–15mm diameter)
- Leaves are standing tall, green, and succulent
- Usually 8–12 weeks from planting (45–60)
How to Harvest:
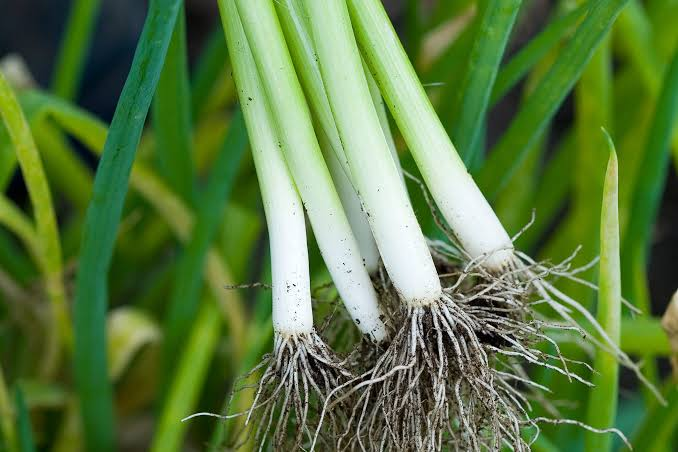
- Pull by hand or use a small hand fork to loosen soil around the base.
- Don’t cut roots or leaves buyers want the whole plant intact.
- Discard damaged plants with blemishes, yellowing, or pest damage.
- Bunch 20–25 plants together with rubber bands for market presentation.
Post-Harvest Best Practices for Onion Farming in Kenya:
- Washing: Clean bunches gently at the packing shed to remove soil.
- Trimming: Remove unsightly older outer leaves while keeping the green tops intact.
- Grading: Sort by size (small, medium, large) to command premium prices for uniform bunches.
- Storage: Keep cool; wrap in plastic for refrigerator storage (lasts several weeks).
- Transport: Use crates, keep cool, and protect from wind during transit.
Are you in need of in-depth knowledge on onion and garlic production? If yes, we are a call away. Contact us for: Onion seedlings, Garlic seedlings, Germinated garlic cloves, Farm planning services, Soil testing, training on onion and garlic growing, Drip irrigation installation and maintenance, Agronomic support, Onion and Garlic value pack and Farm management. For free consultation, placing orders or booking a visit with an agronomist, please contact us via Call or what’s app +254703982228, Email: info@oniondoctor.co.ke You can also check out our social media handles for daily updates on TikTok: https://www.tiktok.com/@oniondoctorke0706252490?_r=1&_t=ZS-96UPUyx6ESL Instagram:https://www.instagram.com/oniondoctorke?igsh=MW5sZzJ6c3BnZ3Z0dw==Facebook:https://www.facebook.com/share/1HouRgLCwS/Twitter:https://x.com/OnionDoctorKe?s=20